Before and After: Budget Friendly Powder Bath Remodel
January 22, 2021
Before and After
One of my favorite spaces to decorate might is a surprising one…
I love nothing more than taking a boring, overlooked, dated powder bath and turning it on it’s head!
Why a powder bath?
I think the typically small size of a half bath or powder bath is a great place to bring in design elements that you might otherwise be scared to use in a large space.
Want to use wallpaper but afraid of the materials and install cost in a larger room?
Why not try it in the half bath!
Want to bring in pattern or bold color way but afraid to commit to such a statement in a main space?
Put it in the powder bath!
I’ve always stretched my design legs in our powder baths.
I once notoriously painted a half bath a deep shade of coral that maybe made too bit of a statement, but I have no regrets. It was a great place to play with a color I’d always wanted to use and, in the end, it was an easy space to update when I no longer loved the look.
Spending a bit of time and attention on a powder bath always pays off and, as a bonus, you can make big changes without a big budget.
Our downstairs powder bath in House #6 got a huge makeover visually while keeping the original elements. Without replacing the tile flooring, toilet, sink or moving plumbing, we completely made over an area in our home that can be seen from the front door and one main living space.
The space also provided the perfect place for me to pop in a bit of pattern in our downstairs. While I love my white walls, I also know that our life needs a little bit of playful pattern, so I set out to spruce up our half bathroom with these goals in mind:
1. spend as little of the budget as possible
2. add in pattern on all walls
3. play with wallpaper
4. use as many items that we already own as possible
5. bring in modern elements, shapes and finishes while keeping it kid friendly
Here’s the space before:
and After:
See that pop of pattern peeking out from the back of the hallway?
That wallpaper will forever be a favorite of mine!
And here it is up close!
That’s the same tile floor, toilet, pedestal sink and even toilet paper holder (I painted it gold with Rub and Buff!). It truly looks so different thanks to a few key changes.
First up, I knew I wanted to change the metals to brass. I’ve always wanted to do a full brass bathroom but could never get the husband on board for our owner’s bathroom renovations.
This little powder bath was an easy swap with no shower hardware, knobs or pulls to worry about so I hit the ground running.
We already owned this circle mirror from a previous house – I think it was on the wall in an entry space – so that was a free upgrade! It’s very reasonably priced and a great size for a petite space.
The faucet was another easy and budget conscious upgrade.
I loved the clean lines and the elongated look paired with the round mirror. For me, the shape and finish are the perfect example of a fresh take on a classic look.
Up next was a great light fixture! While I’m willing to splurge on lighting and save elsewhere, I didn’t have to in the powder room. This 3 light fixture was a crazy steal and I hung it “upside down” for the look I wanted (and to fit our space!).
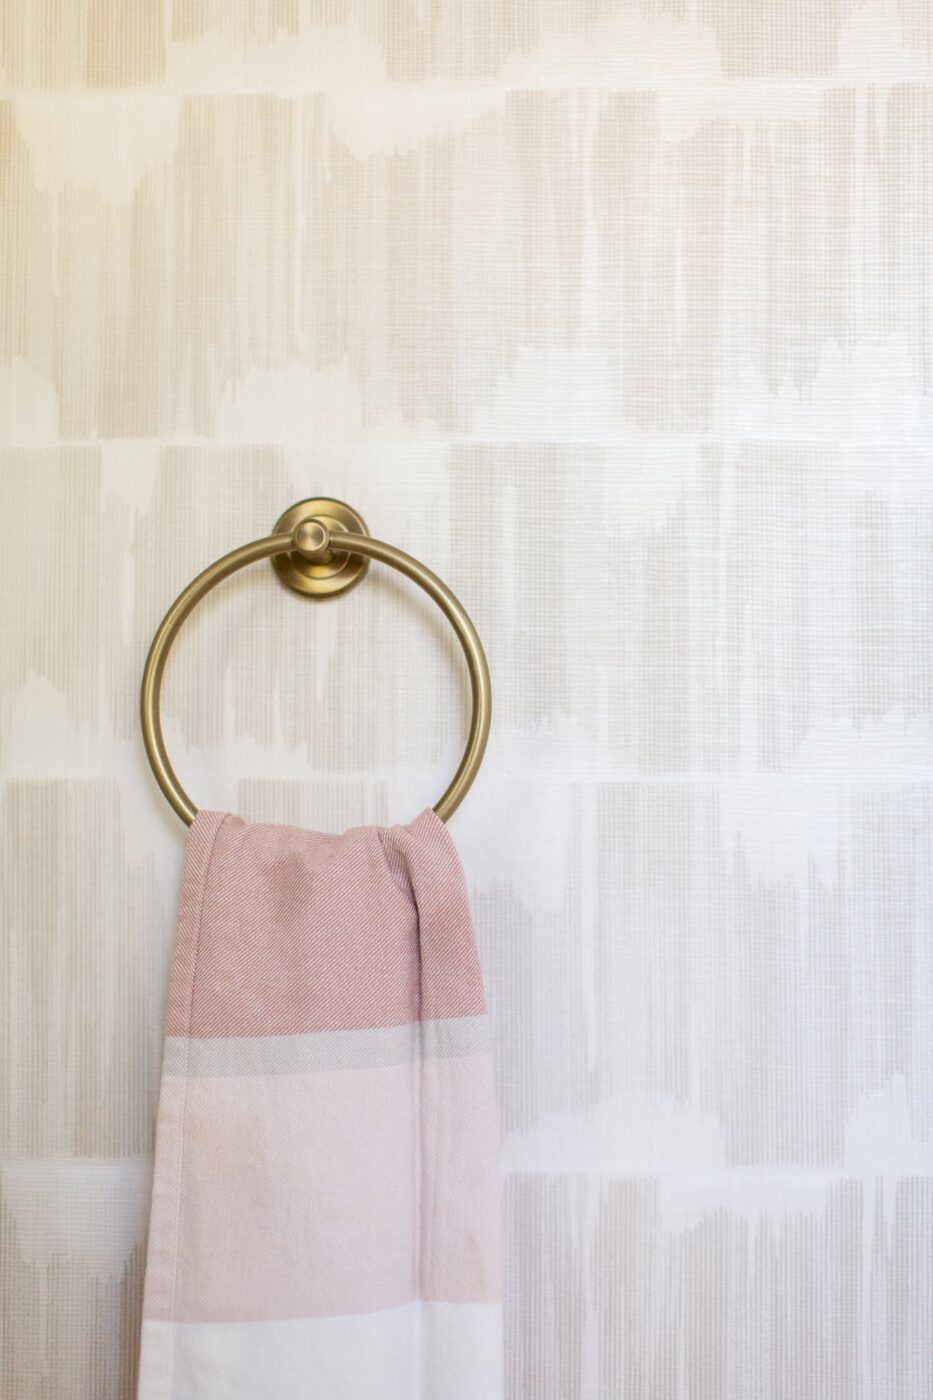
The last piece we needed to update was the towel ring and after a little Rub and Buff on the existing toilet paper holder, the basics were set.
I actually found the wallpaper while scrolling Pinterest. Originally, I wanted it in a darker color option but bailed out at the last minute for the safer choice. To be honest, I think either would have been fantastic because the quality of the paper is so amazing.
The paper is textured and the pattern is so lovely without being too busy or bold.
As a heads up, this is traditional wallpaper and I did have it installed professionally, so it was the largest chunk of the budget by far.
Because I was so conservative elsewhere in the space, the cost was more than worth it, but you could always be more kind to your bottom line by painting the walls or hanging removable wallpaper yourself.
The ceiling and trim are painted Wedding Veil by Benjamin Moore and I do love the true, cool white paired with the softer shades in the wallpaper.
Want to update your powder bath on a budget? Here are my best tips:
Clear the space:
Remove any extra design from your “before” space.
We removed the glass shelf above the toilet that felt dated and unnecessary. Removing that one dated element immediately made the space feel more modern.
Think of the walls:
Want to update the space for the least amount of money? Consider a fresh coat of white paint to freshen the walls.
If you’re interested in adding in a punch of color or pattern, peel and stick wallpaper has come a long way in design and quality. Amazon, Etsy and Lowe’s/Home Depot carry a huge selection of prints and patterns as well as textured elements!
A powder bath is typically small and with all of the metals and porcelain, it can lean towards sterile. Add in woven, natural and soft elements to warm it up.
I chose to place a vintage Turkish rug slightly larger than a traditional bathmat at the sink to break up some of our cream tile flooring.
A woven basket holds extra toilet paper rolls and a tasseled, earth tone towel breaks up the right hand wall.
Don’t be afraid to layer:
Don’t be afraid to layer and style the walls just look like you would in any other room! Source your home for framed photos or prints and add personality to your powder bath walls.
I felt the wallpaper can handle a little art work so we hung two framed prints of House #1 and House #2 above the toilet.
Want some suggestions on budget friendly bathroom mirrors?
Wow! This blog looks exactly like my old one! It’s on a completely different topic but it
has pretty much the same layout and design. Outstanding choice of colors!


Wow! This blog looks exactly like my old one! It’s on a completely different topic but it
has pretty much the same layout and design. Outstanding choice of colors!